Pages

Friday, January 18, 2013

Nokia ဖုန္းအတြက္ အသံုးဝင္ လ်ိွဳ ႔ဝွက္ ကုဒ္နံပါတ္မ်ား


Nokia ဖုန္းအတြက္ အသံုးဝင္ လ်ိွဳ ႔ဝွက္ ကုဒ္နံပါတ္မ်ား
ႏိုကီယာ ဖုန္း user မ်ားအတြက္ အသံုးဝင္မယ့္ လွ်ိဳ ႔ဝွက္ကုဒ္နံပါတ္မ်ားကို မ်ေဝ ေပးလိုက္ရပါတယ္။
*#0000# - Display the software version, the date when the software was built and the phone model. In some cases, the phone model is not the one used by marketing. It is the internal model used inside Nokia. For example, RM-36 is the internal name of Nokia 6680.
*#06# for checking the IMEI (International Mobile Equipment Identity).
*#7780# reset to factory settings.
*#67705646# This will clear the LCD display (operator logo).
*#2820# Bluetooth device address.
*#746025625# Sim clock allowed status.
*#62209526# - Display the MAC address of the WLAN adapter. WLAN support ေသာဖုန္းမ်ားတြင္သာ ရသည္။ 
*#92702689# - 
1. Displays Serial Number.
2. Displays the Month and Year of Manufacture
3. Displays (if there) the date where the phone was purchased (MMYY)
4. Displays the date of the last repair - if found (0000)
5. Shows life timer of phone (time passes since last start)
အေရးေပၚ ဘက္ထရီအားျဖည့္ျခင္း
အေရးေပၚ အေျခအေနမွာ ဘက္ထရီကလည္း အားကုန္ေနျပီဆုိရင္ "*3370#" ကုဒ္ကို ရိုက္ထည့္ျခင္းျဖင့္ ၃၀ ရာခိုင္ႏွုန္း ျပန္လည္ ျမင့္တက္ ပါတယ္။ 
#3370# Deactivate Enhanced Full Rate Codec( EFR) ဆုိရင္ေတာ့ ၅၀ ရာခိုင္ႏွုန္းျပန္ျပည့္ျပီး Sound quality ကအစ ျပန္တက္ပါတယ္။ သုိ႔ေပမယ့္ Talk time ကေတာ့ ၅ ရာခိုင္ႏွုန္း ေလ်ာ့က်သြားပါမယ္။ 
*#3370# - Enhanced Full Rate Codec (EFR) activation. 
ဒါကေတာ့ လိုင္းဆြဲအားပိုတက္ေစျပီး GPRS တို႔ service တက္တာတို႔ လုပ္ေပးပါတယ္။ သုိ႔ေပမ့္ ဘက္ထရီအား ကုန္တာ ျမန္ပါတယ္။ 
*#3370* - (EFR) deactivation.
ဖုန္း အလိုအေလာက္ restart ျပန္လုပ္ပါမယ္။ ဘက္ထရီ ၃၀ ရာခိုင္ႏွုန္း တက္ေပမယ့္ လိုင္းဆြဲအား နည္းနည္းက်သြားပါမယ္။ 
*#4720# - Half Rate Codec activation.
*#4720* - Half Rate Codec deactivation. The phone will automatically restart
If you forgot wallet code for Nokia S60 phone, use this code reset: *#7370925538#
Note, your data in the wallet will be erased. Phone will ask you the lock code. Default lock code is: 12345
Press *#3925538# to delete the contents and code of wallet.
Unlock service provider: sim, turn phone on and press vol up(arrow keys) for 3 seconds, should say pin code. Press C,then press * message should flash, press * again and 04*pin*pin*pin#
*#7328748263373738# resets security code.
Default security code is 12345
#pw+1234567890+1# Provider Lock Status. (use the "*" button to obtain the "p,w" and "+" symbols)
#pw+1234567890+2# Network Lock Status. (use the "*" button to obtain the "p,w" and "+" symbols)
#pw+1234567890+3# Country Lock Status. (use the "*" button to obtain the "p,w" and "+" symbols)
#pw+1234567890+4# SIM Card Lock Status.(use the "*" button to obtain the "p,w" and "+" symbols)
*#147# (Vodafone) this lets you know who called you last *#1471# Last call (Only Vodafone)
*#21# Allows you to check the number that "All Calls" are diverted To
*#2640# Displays security code in use
*#30# Lets you see the private number
*#43# Allows you to check the "Call Waiting" status of your phone.
*#61# Allows you to check the number that "On No Reply" calls are diverted to
*#62# Allows you to check the number that "Divert If Unreachable(no service)" calls are diverted to
*#67# Allows you to check the number that "On Busy Calls" are diverted to
*#67705646# Removes operator logo on 3310 & 3330
*#73# Reset phone timers and game scores
*#746025625# Displays the SIM Clock status, if your phone supports this power saving feature "SIM Clock Stop Allowed", standby time ပိုရေစပါတယ္။ 
*#7760# Manufactures code
*#7780# Restore factory settings
*#8110# Software version for the nokia 8110
--
အခ်ိဳ ႔ကုဒ္နံပါတ္မ်ားကို သတိထား အသံုးျပဳရန္ လိုအပ္ပါတယ္။ 
--
  CREDIT TO Aung Kham (TSJ team)
ကိုလတ္(ကြ်ဲဆင္း)

Samsung မိုဘိုင္းဖုန္း၏ လွ်ိဳ ႔ဝွက္ ကုဒ္နံပါတ္မ်ား

 Samsung မိုဘိုင္းဖုန္း၏ လွ်ိဳ ႔ဝွက္ ကုဒ္နံပါတ္မ်ား 
Samsung မိုဘိုင္းဖုန္း user မ်ားအတြက္ အသံုးဝင္မယ့္ လွ်ိဳ ႔ဝွက္ကုဒ္နံပါတ္ မ်ားကို ရွာေဖြ မွ်ေဝေပးလိုက္ရပါတယ္။ 
*#9125# : Smiley
*#9999# : Software Version
*#06# : IMEI Number
*#0001# : Serial Number
*#9998*523# : LCD Contrast
*#0228# or *#8999*228# : Battery Info
*#8999*636# : Display Storage Capacity
*#8999*778# : Display SIM Card Information
*#8999*782# : Show Date And Alarm Clock
*#8999*786# : The Display During Warning
*#8999*837# : Samsung Hardware Version
*#0523# - *#8999*523# : Display Contrast
*#8999*638# : Show Network Information
*#9998*246# : Battery Status- Memory Capacity
*#9998*324# - *#8999*324# : Debug Screen
*#9998*842# - *#8999*842# : Vibration Test
*#9998*289# - *#8999*289# : Alarm Beeper - Ringtone Test
*#8999*9266# : Display Received Channel Number And Received Intensity
*#8999*364# : Watchdog ON/OFF
*#8999*427# : WATCHDOG Signal Route Setup
*2767*3855# : Full Reset (Caution every stored data will be deleted.)
*2767*2878# : Custom Reset
*2767*927# : Wap Reset
*2767*226372# : Camera Reset (deletes photos)
*2767*688# : Reset Mobile TV
#7263867# : RAM Dump (On or Off)
#*4773# : Incremental Redundancy
#*7785# : Reset wake-up & RTK Timer Variables
#*7200# : Tone Generator Mute
#*3888# : BLUETOOTH Test Mode
#*7828# : Task Screen
#*2562# : Restarts Phone
#*2565# : No Blocking? General Defense.
#*3353# : General Defense, Code Erased.
#*3837# : Phone Hangs on White screen.
#*3849# : Restarts Phone
#*7337# : Restarts Phone (Resets Wap Settings)
#*2886# : Auto Answer ON/OFF
#*7288# : GPRS Detached/Attached
#*7287# : GPRS Attached
#*2077# : GPRS Switch
#*22671# : AMR REC START
#*22673# : Pause REC
#*22674# : Resume REC
#*22675# : AMR Playback
#*22676# : AMR Stop Play
#*22677# : Pause Play
#*22678# : Resume Play
#*77261# : PCM Rec Req
#*77262# : Stop PCM Rec
#*77263# : PCM Playback
#*77264# : PCM Stop Play
#*22679# : AMR Get Time
#*7666# : White Screen
#*7693# : Sleep Deactivate/Activate
#*2286# : Data Battery
#*2679# : Copycat Feature Active/Deactivate
#*3940# : External Loop-Test 9600 bps
#*4263# : Hands Free Mode Activate/Deactivate
#*2558# : Time ON
#*3941# : External Loop-Test 115200 bps
#*5176# : L1 Sleep
#*7462# : SIM Phase
#*7983# : Voltage/Freq
#*7986# : Voltage
#*8466# : Old Time
#*2255# : Call Failed
#*5376# : Delete All Sms!!!!
#*2337# : Permanent Registration Beep
#*2474# : Charging Duration
#*2834# : Audio Path (Hands-free)
#*3270# : DCS Support Activate/Deactivate
#*3282# : Data Activate/Deactivate
#*3476# : EGSM Activate/Deactivate
#*3676# : Format Flash Volume!!!
#*4760# : GSM Activate/Deactivate
#*4864# : White Screen
#*7326# : Accessory
#*7683# : Sleep Variable
#*3797# : Blinks 3D030300 In RED
#*7372# : Resetting The Time To DPB Variables
*#8999*667# : Debug Mode
*#92782# : Phone Model (Wap)
#*5737425# : JAVA Mode
*#2255# : Call List
*#232337# : Bluetooth MAC Address
*#5282837# : Java Version
*#8999*8376263# : All Versions Together
*#8999*8378# : Test Menu
*#4777*8665# : GPSR Tool
*#8999*523# : LCD Brightness
*#8999*377# : Error LOG Menu
*#8999*327# : EEP Menu
*7465625*228# : Active Lock ON
#7465625*228# : Active Lock OFF
*7465625*28638# : Auto Network Lock ON
#7465625*28638# : Auto Network Lock OFF
*7465625*28782# : Auto Subset Lock ON #7465625*28782# : Auto Subset Lock OFF
*7465625*2877# : Auto SP Lock ON
#7465625*2877# : Auto SP Lock OFF
*7465625*2827# : Auto CP Lock ON 
#7465625*2827# : Auto CP Lock OFF
*7465625*28746# : Auto SIM Lock ON 
#7465625*28746# : Auto SIM Lock OFF
*#7465625# : Check the phone lock status 
*7465625*638*Code# : Enables Network lock
#7465625*638*Code# : Disables Network lock 
*7465625*782*Code# : Enables Subset lock
#7465625*782*Code# : Disables Subset lock 
*7465625*77*Code# : Enables SP lock
#7465625*77*Code# : Disables SP lock 
*7465625*27*Code# : Enables CP lock
#7465625*27*Code# : Disables CP lock 
*7465625*746*Code# : Enables SIM lock
#7465625*746*Code# : Disables SIM lock 
အခ်ိဳ ႔ကုဒ္မ်ား မွားယြင္းႏိုင္သျဖင့္ သတိထား အသံုးျပဳရန္ လိုအပ္ပါသည္။ 

"The command pormet has been disabled by your administrator" Error ေျဖရွင္းနည္း

"The command pormet has been disabled by your administrator" ဆိုတဲ႔ Error တတ္ေနလို႔ပါဆိုျပီး Mail ကေနတဆင့္ Myo Myint Aung အကူညီေတာင္းထားတာေလးပါ... ေအာက္ပါနည္းလမ္း (၃) ခုနဲ႔ ေျဖရွင္းၾကည့္ႏိုင္ပါတယ္...။
၁). Start > Run ကိုေခၚျပီး ဒီေအာက္က အနီေရာင္ နဲ႔ ကုဒ္ေတြ Copy ကူးျပီး Enter ေခါက္ပါ...။
REG add HKCU\Software\Policies\Microsoft\Windows\System /v DisableCMD /t REG_DWORD /d 0 /f

CMD ကိုေခၚၾကည့္ပါ.... မရေသးရင္ ...
၂). Start > Run box ထဲမွာ Regedit ကိုရိုက္ထည့္ျပီး OK (or) Enter  ေခါက္ပါ... Registry Editor Box ေပၚလာရင္ 
HKEY_CURRENT_USER > Software > Policies > Microsoft > Windows > System ထိ အဆင့္ဆင့္ ေရာက္ေအာင္သြားပါ....
System ကို Click လိုက္ရင္ ညာဘက္မွာ  DisableCMD  ကိုရွာပါ.. ေတြ႕ရင္ Double Click နဲ႔  Value data ကို "0" ေျပာင္းေပးျပီး  Registry Editor Box ကိုပိတ္လိုက္ပါ....
CMD ကိုေခၚၾကည့္ပါ.... မရေသးရင္ ...
၃). Start  > Run မွာ gpedit.msc  ကိုရိုက္ထည့္ျပီး OK (or) Enter ေခါက္ပါ.... Group Policy Editor box တတ္လာရင္... 
User Configuration > Administrative Templates > System
အေပၚကအတိုင္း အဆင့္ဆင့္သြားပါ  System ကို Click ျပီး
 Prevent access to the command prompt
ကို ရွာပါ... ေတြ႕ရင္ Double-click နဲ႔ Not Configured (or) Disbled ေပးလိုက္ပါ...
အဆင္ေျပပါေစ....

Zawgyi-One ေရာ Myanmar3 ကိုပါ ဖတ္လို႔ရေအာင္


Unicode ျဖစ္တဲ့ Myanmar3 Font နဲ႔ ZawgyiOne နဲ႔ေရးထားတဲ့ website ေတြကို ဘယ္ font နဲ႔ ေရးထား ေရးထား ဖတ္လို႔ ရေအာင္ လုပ္လို႔ရတဲ့ နည္းေလးျဖစ္ပါတယ္။ ဒီ blog မွာေတာ့ အေပၚမွာ drop down နဲ႔ ေ႐ြးလို႔ရေအာင္လုပ္ထားေပးထားပါတယ္။  (click here to see image)  


Internet Explore


  • Click to download Myanmar3_IE.reg
  • ဖိုင္ကိုေဒါင္းလုဒ္ယူျပီးတာနဲ႔ Myanmar3_IE.reg ကို install လုပ္ပါ
  • Tools ေအာက္က Internet Option က fonts ကို Zawgyi-One ကိုေပးထားရပါမယ္.။
  • ဒီ ေနရာကို click ၿပီး save လုပ္ပါ။
  • IEကိုဖြင့္ပါ.. Tools >Internet Option>Accessibility > user style sheet မွာ Format document usingmy style sheet ကို အမွန္ျခစ္ျပီး Browse ကေနတဆင့္ ခုန save လုပ္ထားတဲ့ ie.css ကိုထည့္ေပးပါ..။


Mozila firefox


  1. Menu ရဲ႔ Tools > Options > Content tab မွာ Default Font ကို Zawgyi-One ေပးထားပါ.
  2. Font Size ေဘးက Advanced button ကို ထပ္ႏွိပ္ပါ.. အဲဒိမွာ
  3. Allow pages to choose their own fonts, instead of my selections above” ဆိုတဲ႔ စာေၾကာင္းေလးကို အမွန္ျခစ္ေပးပါ
  4. ေအာက္က default character encoding မွာ Unicode UTF-8   ကိုေ႐ြးပါ။ (click here to see image)
ဒါဆိုရင္ သင့္အေနနဲ႔ Mozilla Firefox ကို အသံုးျပဳျပီး Zawgyi-One နဲ႔ေရးထားတာေရာ Myanmar3 နဲ႔ေရးထားတာကိုေရာ ဖတ္ရႈလို႕ရနိုင္ပါျပီ။ ေအာက္က ပံုကို ၾကည့္ျပီး လုပ္ရင္ ပိုအဆင္ေျပမယ္ထင္ပါတယ္


Chrome

  1. Google chrome browser ကိုဖြင့္ပါ
  2. ဒီ link ကို copy လုပ္ၿပီး chrome browser ကေနဖြင့္ပါ။ https://chrome.google.com/webstore/detail/dlgmiidgfdpjcnhnhafijlpinepjkpnd
  3. က်လာတဲ့ page မွာ install button ကို click လုပ္လိုက္ပါ။ (click to see image)
  4. ၿပီးသြားရင္ chrome ရဲ႕ toolbar မွာ “က၊ခ” ကြက္ကေလးကိုေတြ႔ ပါလိမ့္မယ္။ (Click to see image) ဒါဆိုရပါၿပီ။

Posted by Who Am I?  http://forum.mmitd.com

မူရင္း။ ။  http://blog.myanmars.net

Monday, January 14, 2013

Computer တစ္လံုးဝယ္ေတာ့မယ္ဆိုရင္ (ျမန္မာလို IT Ebook)

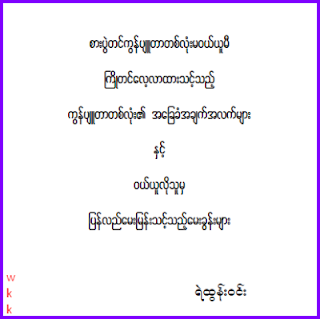
 ကြန္ပ်ဴတာ တစ္လံုး ဝယ္ယူေတာ့မယ္ဆိုရင္ ဘယ္လို ကြန္ပ်ဴတာ အမ်ိဳးအစားကို ဝယ္ယူသင့္တယ္, ဘာေတြ သိထားဖို႕လိုမယ္, တျခားသိထားသင့္တဲ႔ အေၾကာင္းအရာမ်ားစြာ ပါဝင္ပါတယ္....
 ကိုရဲထြန္းဝင္း ေရးသား ျပဳစုထားတာပါ .... အားလံုးေလ့လာလို႔ရေအာင္ တဆင့္ျပန္လည္မွ်ေဝေပးလိုက္ပါတယ္....
Click Here to Download

Samsung Galaxy S Plus GT-I9001 ကို Root လုပ္ၿပီး ျမန္မာေဖာင္႔ထည္႔သြင္းနည္း


Theodo: အစ္ကုိေရ ျဖစ္နုိင္ရင္ Glaxy S Plus ဖုန္းေလး Root လုပ္နည္းေလးျပန္တင္ေပးပါလား အခက္အခဲျဖစ္ေနလုိ႔ပါ...
အခုေၿပာမဲ႔နည္းလမ္းေလးက Samsung Galaxy S Plus GT-I9001 တြက္
- i9001 တြက္ မည္သည္႔ ဗားရွင္းမဆို ရပါတယ္
- Odin နဲ႔ Multidownloader သုံးစရာမလိုပါဘူး
- မလိုအပ္တဲ႔ခါ ၿပန္ၿပီးေတာ႔လဲ unroot လုပ္လုိ႔ရပါတယ္

WARNNING !
ဖုန္းဆိုင္ကိုသြားၿပီး မလုပ္ခ်င္သူေတြတြက္ မိမိကိုယ္တိုင္လုပ္ခ်င္တယ္ဆိုရင္ လုပ္ႏိူင္ပါတယ္။
အခန္႔မသင္႔လို႔ မိတ္ေဆြ ဖုန္းတခုခုၿဖစ္ရင္ေတာ႔ ကြ်န္ေတာ္နဲ႔ မသက္ဆိုင္ဘူးေနာ္ :)
ဒါေပမဲ႔ စိတ္မပူပါနဲ႔ ကြ်န္ေတာ္ကိုတုိင္ စမ္းသပ္းေအာင္ၿပီးမွ ေၿပာၿပတာပါ

အခုနည္းလမ္းက သင္႔ရဲ႔ဖုန္း Warranty မေပးပါဘူး ဒါေပမဲ႔ မစိုးရိမ္ပါနဲ႔ ၿပန္ၿပီး
unroot လုပ္ႏိူင္တဲ႔တြက္ Warranty တြက္အဆင္ေၿပပါတယ္။

Samsung Galaxy S Plus GT-I9001 (Any Room) ကို Root လုပ္ဖို႔တြက္ ဘာေတြလိုအပ္လဲ ?
Root လုပ္ဖို႔တြက္လိုအပ္တဲ႔ ဖိုင္ ၃ ဖိုင္ကို ေဒါင္းလုပ္ဆြဲပါ။ 


Samsung Galaxy S Plus GT-I9001 (Any Room) ကို Root လုပ္နည္း
အဆင္႔ ၁ : ပထမဆုံး Root-i9001-Signed.zip ဖိုင္ကို Phone SD ကဒ္ထဲသို႔ Copy ကူးပါ။
အဆင္႔ ၂ : ေဒါင္းလုပ္ဆဲြထားေသာ Easy Reboot Recovery.zip ဖိုင္ကို Desktop ေပၚတြင္
winrar နဲ႔ၿဖည္ၿပီး RebootRecovery.bat ဖိုင္ကို run ေပးပါ။

ဖုန္းကို USB Cable နဲ႔ခ်ိတ္ဆက္ထားၿပီး (Phone Setting > Applications >Development > USB Debugging ကို
Check box ” On ” ေပးထားပါ )
အဆင္႔ ၃ : ဖုန္းကို ပါ၀ါပိတ္ၿပီး ( ဖုန္း Bettery ကိုၿဖဳတ္ၿပီး ၿပန္တပ္ေပးပါ )
အဆင္႔ ၄ : ဖုန္းရဲ႔ Recovery Mode သို႔သြားပါမယ္။ အဲတြက္ Vloume + ႏွင္႔ POWER ကို တြဲႏွိပ္ေပးပါ
ပုံမွန္ ဖုန္းတက္လာေနၾကတဲ႔တိုင္း samsung logo နဲ႔ Samsung Galaxy S Plus တလွည္႔စီတက္လာပါလိမ္႔မယ္
Vloume + ႏွင္႔ POWER ခလုတ္ကို မလြတ္ပါနဲ႔။
၃ၾကိမ္ေၿမွာက္ တက္လာၿပီးသြားရင္ recovery mode ေတြ႔ရပါလိမ္႔မယ္။
( ဒီေနရာမွာ အရမ္းအေရးၾကီးပါတယ္ ) Vloume + ႏွင္႔ POWER လြတ္ၿပီး Menu button ဖိႏွိပ္ထားေပးပါ။
အဆင္႔ ၅ : Recovery mode ထဲမွအသုံးၿပဳဖို႔တြက္ VOLUME DOWN ႏွင္႔ HOME ခလုတ္ကို အသုံးၿပဳပါမယ္။
အဆင္႔ ၆ : Volume Down ခလုတ္ကို တခ်က္ခ်င္းႏွိပ္ၿပီး recovery mode ထဲမွ
” apply update from sdcard ” ကိုေရြးၿပီး HOME ခလုတ္ကို ႏွိပ္ေပးပါ။
အဆင္႔ ၇ : Volume Down ခလုတ္ကို တခ်က္ခ်င္းႏွိပ္ၿပီး Root.zip file ကိုေရြးၿပီး HOME ခလုတ္ႏွိပ္ေပးပါ။
(ဖိုဒါနဲ႔ထည္႔ထားဆိုရင္ ဖုိဒါထဲသြားၿပီး Root-i9001-Signed.zip ကိုေရြးေပးပါ ) ။
အဆင္႔ ဂ : Root file install လုပ္ၿပီးသြားၿပီဆိုလွ်င္ ” reboot system now ” ကို ေရြးၿပီး ဖုန္း reboot က်တာကိုေစာင္႔ေပးပါ။
အဆင္႔ ၉ : ဖုန္းၿပန္တာလာၿပီ မိမိဖုန္းမွာ Superuser ကိုေတြ႔ရၿပီဆိုလွ်င္ မိမိဖုန္း Root လုပ္လို႔ၿပီးသြားပါၿပီ။
* အဆင္႔ေတြမွန္ရဲ႔သားနဲ႔ Recovery Mode မတက္ဘူးဆိုရင္ ၁၀မိနစ္ေလာက္ ခဏနား လမ္းေလး ဘာေလးေလွ်ာက္ ေရေအးေအးေလး  ၁ ခြက္ (သို႔)
အေအးေလး ၁ ခြက္ေလာက္ေသာက္ၿပီး အခုနည္းလမ္းတိုင္း ထပ္ၿပီးၾကိဳးစားၾကည္႔ေပးပါ* :P
အဆင္ေၿပပါလိမ္႔မယ္……
အဆင္မေျပေသးရင္ ဒီ SuperOneClick v2.3.3 နဲ႔ Root ႏိုင္ပါတယ္...
Credit to: http://myanmarmobileapp.com/

80 + Free Ebooks From Microsoft ( ျမန္ျမန္ Down ထားၾကပါရန္)

IT နည္းပညာနဲ႕ပတ္သက္တဲ့ စာအုပ္မ်ားကို Microsoft မွ အခမဲ့ေပးေနပါၿပီ..အခမဲ့ရတုန္းေလး လိုအပ္သူမ်ား ျမန္ျမန္ ေဒါင္းထားၾကပါခင္မ်ာ။ စာအုပ္ေတြလဲ ေတာ္ေတာ္ေလးကိုစံုပါတယ္..Html , java , css, windows 8 app , SQL Server စတဲ့အသံုး၀င္စာအုပ္ေပါင္းမ်ားစြာပါ၀င္ပါတယ္ခင္မ်ာ။
 
Powered by Blogger